¶设计特点
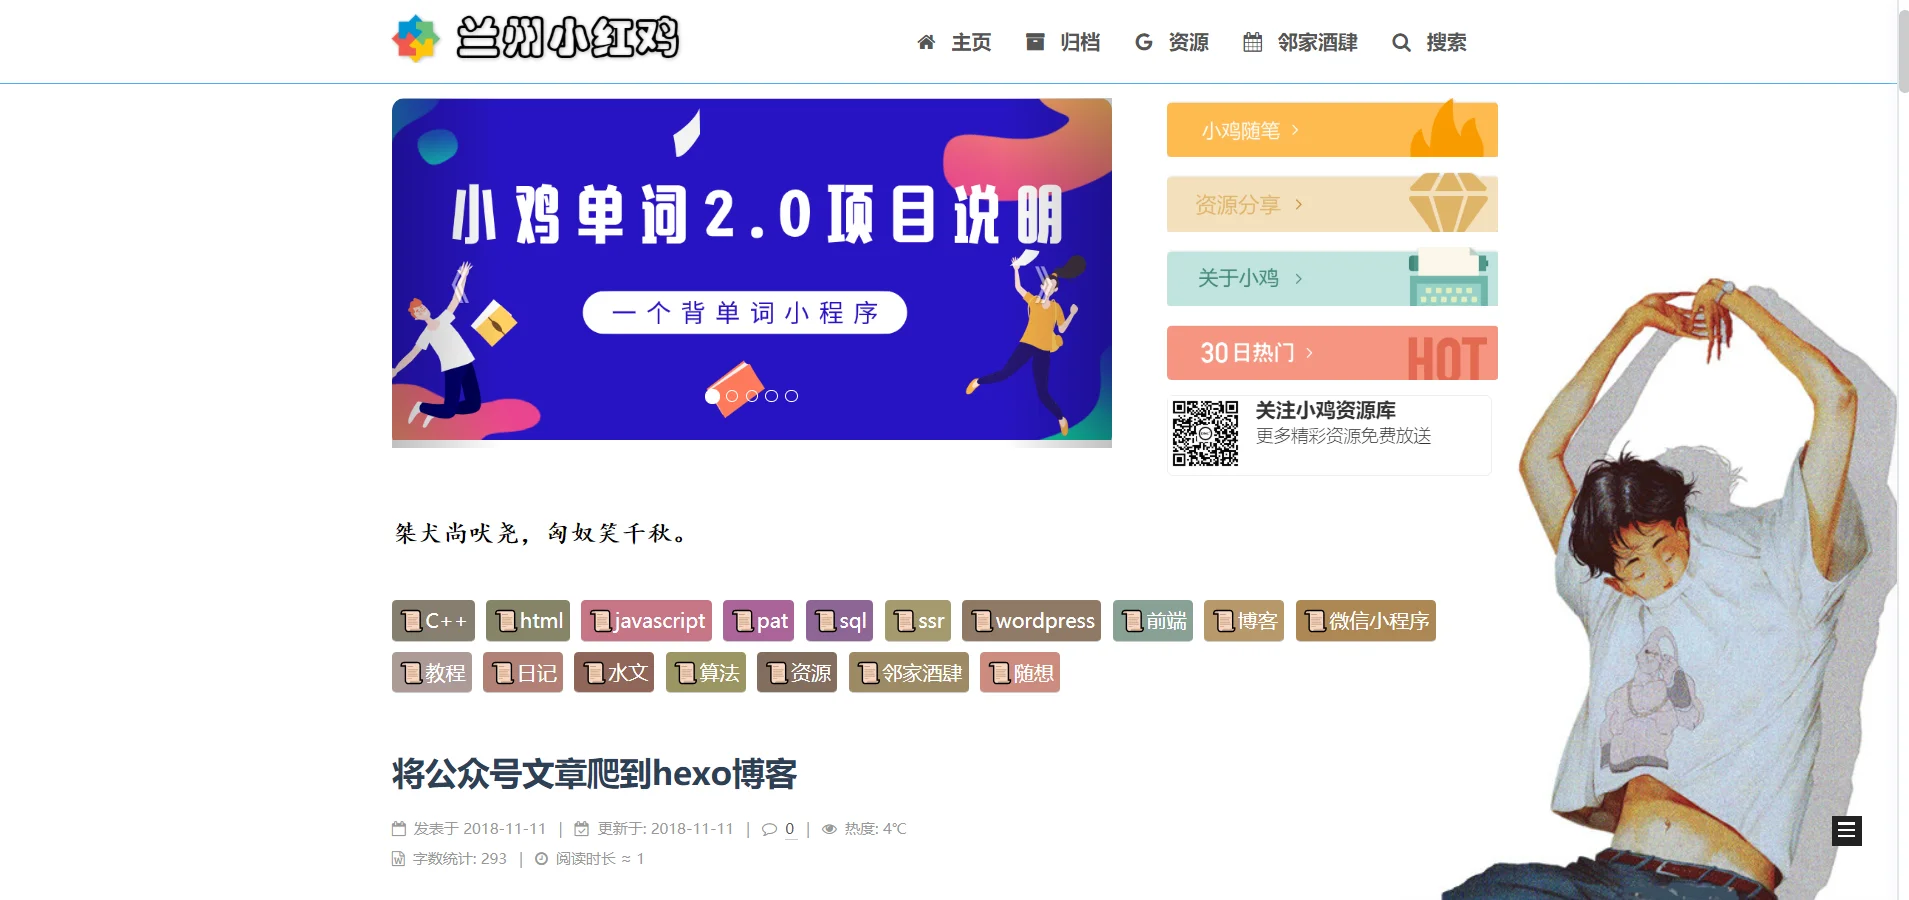
轮播图UI:模仿简书可以直接在每篇文章的md文件里设置是否要设为轮播图的文章
就是我们每次新写一篇文章,用hexo生成一个md文件,我们只要在头部注明是否要作为轮播图的文章比如这样:
title: hexo建站笔记之首页文章轮播图
carousel: true					//是否设为轮播图
img: https://轮播图的图片			//轮播图图片链接
date: 2018-11-13 15:25:40
updated: 2018-11-13 15:25:40
tags: 博客
categories: 博客
效果图如下
¶如何实现
- 在themes\next\layout下新建swig格式的文件carousel.swig
写入以下内容
<!DOCTYPE html>
<html>
<head>
    <meta charset="utf-8">
    <title>Bootstrap 实例 - 轮播(Carousel)插件的标题</title>

<link rel="stylesheet" href="https://cdn.staticfile.org/twitter-bootstrap/3.3.7/css/bootstrap.min.css">
    <script src="https://cdn.staticfile.org/jquery/2.1.1/jquery.min.js"></script>
<script src="https://cdn.staticfile.org/twitter-bootstrap/3.3.7/js/bootstrap.min.js"></script>

</head>
<style type="text/css">
    .glyphicon-chevron-left:before{
        content: "《"
    }
    .glyphicon-chevron-right:before{
        content: "》"
    }

</style>
<body>

<div id="myCarousel" class="carousel slide" data-ride="carousel" data-interval="3500" style="width: 65%; float: left; height: 280px;">
    <!-- 轮播(Carousel)指标 -->
    <ol class="carousel-indicators">
    {% set index = 0 %}
    {% for post in site.posts %}
        {% if post.carousel===true %}
            <li data-target="#myCarousel" data-slide-to="{{index}}"></li>
            {% set index = index+1 %}
        {% endif %}
    {% endfor %}
    </ol>
    <!-- 轮播(Carousel)项目 -->
    <div class="carousel-inner" style="height: 280px; border-radius: 10px;">

{% set act = 0 %}
 {% for post in site.posts %}
    {% if post.carousel===true %}
        {% if act===0 %}
            <a class="item active" href="{{ url_for(post.path) }}" target="_blank" style="height: 100%;">
                <img src="{{post.img}}" style="width: 100%; height: 100%;" >
                <div class="carousel-caption"></div>
            </a>
            {% set act = 1 %}
            {% elseif act===1 %}
                <a class="item" href="{{ url_for(post.path) }}" target="_blank" style="height: 100%;">
                    <img src="{{post.img}}" style="width: 100%; height: 100%;" >
                    <div class="carousel-caption"></div>
                </a>
            {% endif %}
    {% endif %}
{% endfor %}

    </div>
    <!-- 轮播(Carousel)导航 -->
    <a class="left carousel-control" href="#myCarousel" role="button" data-slide="prev">
        <span class="glyphicon glyphicon-chevron-left" aria-hidden="true"></span>
        <span class="sr-only">Previous</span>
    </a>
    <a class="right carousel-control" href="#myCarousel" role="button" data-slide="next">
        <span class="glyphicon glyphicon-chevron-right" aria-hidden="true"></span>
        <span class="sr-only">Next</span>
    </a>
</div>
</body>
</html>
¶新建carousel页面
命令
hexo new page carousel
然后编辑这个carousel.md文件
头部写入
---
title: carousel
date: 2018-11-12 20:06:34
type: "carousel"
layout: carousel
---
在需要加入轮播图的页面部位加入代码
比如我要在首页加轮播图
那么打开themes\next\layout下的index文件
找到
{% block content %}
在这段代码的下面加上
<iframe src="/carousel/" width="100%" height="320px" style="border: 0px; overflow: hidden; border-radius: 10px;" scrolling="no"></iframe>
然后就OK了
¶加入新的轮播图
当我们要把哪篇文章设为轮播图时
只需在其md文件的头部加入如下代码加好了
carousel: true
img: 轮播图片链接
不过每次加入新的轮播图的时候,记得先清理缓存
- hexo clean
- hexo d -g
暂无评论,来抢沙发吧。